# Cherry Studio Guide
`Cherry Studio` is a desktop AI chat client with multi-model support. It has a clean interface, supports custom providers, and is suitable for daily conversations and multi-model comparison.
## Installation
Go to the [Cherry Studio download page](https://cherry-ai.com/download) and choose the installer for your operating system.
Cherry Studio provides both **Setup installers** and **Portable builds**, with x64 and ARM64 support.
1. Open the [download page](https://cherry-ai.com/download) and choose the installer for your system architecture:
- Regular PC: choose the recommended standard build.
- ARM device: choose the `ARM` build.
2. After downloading, double-click the installer and follow the wizard.
3. After installation, launch `Cherry Studio` from the Start menu.
> **Note:** Cherry Studio does not support Windows 7.
> If startup reports missing runtime libraries, install the [Visual C++ Redistributable](https://aka.ms/vs/17/release/vc_redist.x64.exe) first.
Cherry Studio provides Intel and Apple Silicon versions. Choose based on your chip:
- **Apple Silicon**: choose the `Apple Silicon` version.
- **Intel chip**: choose the `Intel` version.
1. Open the [download page](https://cherry-ai.com/download) and download the matching `.dmg` file.
2. Open the `.dmg` and drag `Cherry Studio` into the Applications folder.
3. Launch `Cherry Studio` from Launchpad or Applications.
The Linux version is distributed as AppImage and supports x86_64 and ARM64 architectures.
1. Open the [download page](https://cherry-ai.com/download) and choose the AppImage for your architecture:
- Regular x86 device: choose the `x86_64` build.
- ARM device: choose the `ARM64` build.
2. After downloading, make it executable:
```bash
chmod +x CherryStudio-*.AppImage
```
3. Double-click it, or run it from a terminal:
```bash
./CherryStudio-*.AppImage
```
The AppImage includes all dependencies and works on most mainstream Linux distributions.
## Connect to GoRouter
After installation, add GoRouter as a custom provider in Cherry Studio.
1. Follow [Create API Key](https://docs.gorouter.cc/en/docs/gorouter/create-apikey.md) to generate an API key.
2. Open `Cherry Studio`, go to **Settings -> Model Services**, and click to add a provider.
3. Choose provider type: `OpenAI-Response`.

4. Enter the generated API key and API URL `https://www.gorouter.cc/v1`, fetch the model list, and select the models you need.
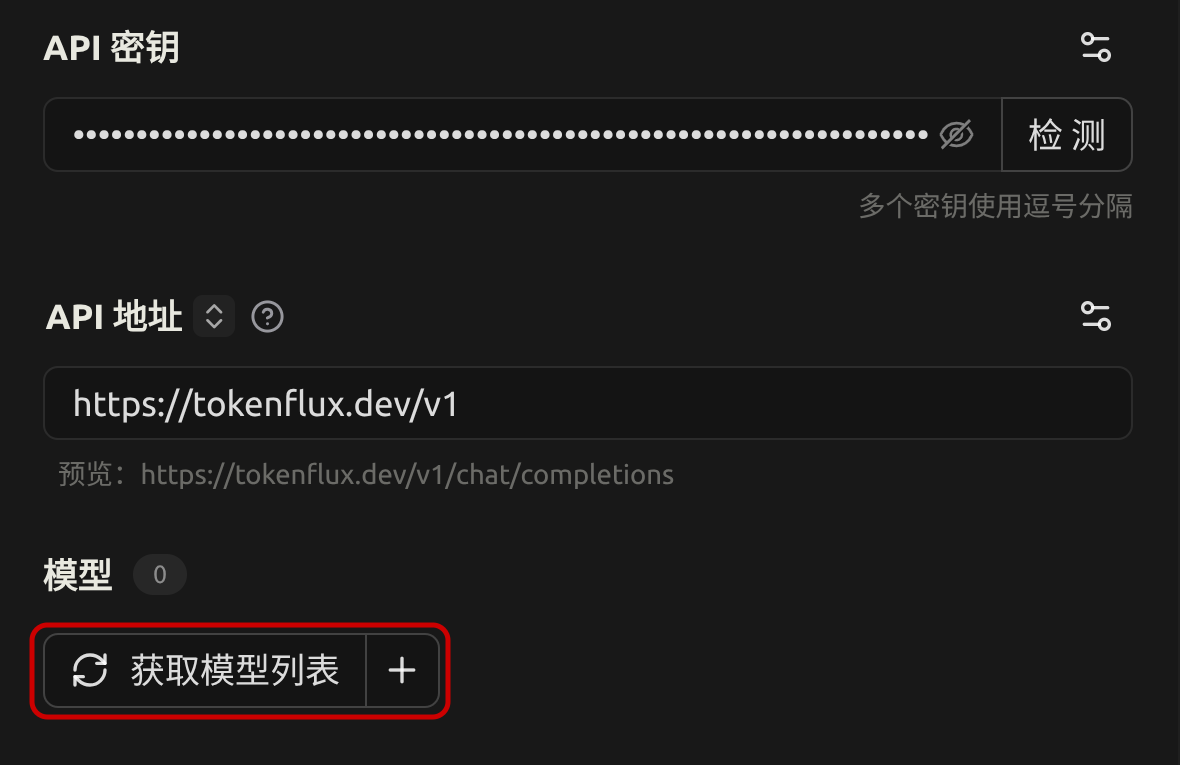
5. Save it, then add the models you want to use in the model list, such as `gpt-5.4` or `gpt-5.4-mini`.
6. Return to the chat interface and select the model you just added to start using it.
## Next Steps
After setup, you can chat with GoRouter-supported models directly in `Cherry Studio`.
More related content:
- [Balance and Billing](https://docs.gorouter.cc/en/docs/gorouter/billing.md)